

Creating a softly stenciled background is a great way to make your focal point pop of your card backgrounds. Foam blending tools or soft brushes are the perfect choice for adding subtle color and pattern. Stephanie used Clarity Stencil Brushes and the Small Brick Wall Stencil to craft her beautiful card base - watch the video to learn more!
Let's take a look at more examples of using stencils to create your card backgrounds!
Julia created intriguing overlap by using the One Way Chevron Stencil to first blend Sno Cone Premium Dye Ink before shifting the stencil slightly and adding a layer of Sour Apple.


 Supplies used in today's video:
Jodi went BOLD allowing her stenciled background to become the star of the show. The Geometric Grid Stencil was used to create a blended ombre of Tropical Teal and After Midnight Premium Dye Inks. Some subtle sparkle really pulls it all together!
The Big Balloons Stencil is a little different in that it doesn't feature a repeating pattern but rather, a selection of five different balloon shapes along with your choice of three different highlights that you can add. Kimberly chose one of the balloon shapes and layered them onto her card in Summer Splash, Coral Crush, and Tickled Pink - beautiful!
Supplies used in today's video: | 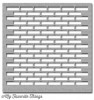 |  |  | 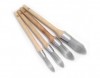 |
 |  |  |  |  |
 |  |  |  |  |
 |  |
Really Pretty card!!
ReplyDelete